# Step 3: Specify the design
PERMANOVA requires a **design file** to run.
You can see the Factors associated with the holdfast data matrix (or its resemblance matrix) by clicking on **Edit** > **Factors...**. These factors will be 'visible' to the PERMANOVA dialog that we will use to create our design file.
For this study, we want to create a design file that has all of the information that PERMANOVA will need to construct the correct partitioning, the correct pseudo-F ratios and the correct permutation algorithms to test every term in the model that is implied by the design. For this example, we have a fully hierarchical (nested) study design with three random factors: Locations, Sites (within Locations) and Areas (within Sites).
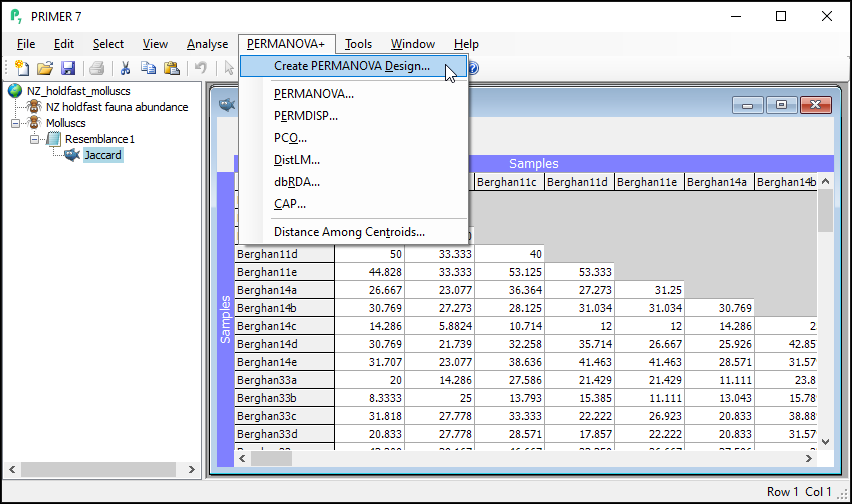
1. From the resemblance matrix ('Jaccard'), click **PERMANOVA+** > **Create PERMANOVA Design...**.
[](https://learninghub.primer-e.com/uploads/images/gallery/2024-04/11-p-create-design.png)
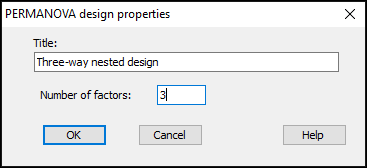
2. In the 'PERMANOVA design properties' dialog, pick a title for your design file, and indicate the number of factors. For the holdfast example, we will choose (Title: Three-way nested design)&(Number of factors: 3), then click **OK**.
[](https://learninghub.primer-e.com/uploads/images/gallery/2024-04/11b-design-title.png)
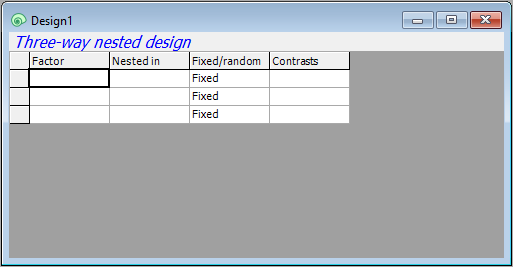
3. You will see an empty design file with three rows, one for each factor. Each row will correspond to a factor in your design. You will need to specify, in turn, the name and properties of each factor for the analysis in its own row.
[](https://learninghub.primer-e.com/uploads/images/gallery/2024-04/12-empty-design-file.png)
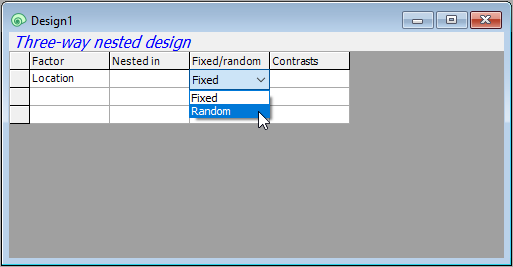
4. **Location:** First, in row 1, click in the blank cell under the word 'Factor', and you will see a drop-down menu listing all of the factors associated with the resemblance matrix from which this design file was created. Choose 'Location' to fill this cell. Location is not nested in anything, so we leave the second cell in row 1 blank. In the third cell of row 1, we have to specify that Location is a **random** factor, so click on the word 'Fixed' and change it to 'Random'.
[](https://learninghub.primer-e.com/uploads/images/gallery/2024-04/12a-location-choices.png)
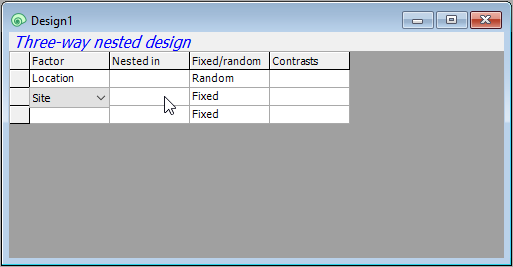
4. **Site:** Next, we need to specify the second factor in the design in row 2 of the design file. Click on the cell in row 2 of the 'Factor' column (column 1) and choose 'Site'.
[](https://learninghub.primer-e.com/uploads/images/gallery/2024-04/12aa-site-start.png)
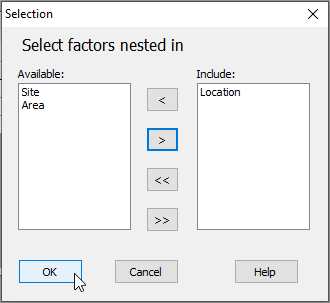
5. Sites are **nested in Locations**, so we have to specify that in column two ('Nested in') accordingly. Click on the cell in row 2 in column 2 and a 'Selection' dialog will pop up to allow you to choose the factors within which 'Site' is nested. You will need to click on the word 'Location' (in the 'Available:' box on the left), then on the single-right-arrow button ([](https://learninghub.primer-e.com/uploads/images/gallery/2024-04/04g-single-arrow.png)) to move it over into the 'Include:' box (on the right), then click **OK**, like so:
[](https://learninghub.primer-e.com/uploads/images/gallery/2024-04/12b-site-nesting.png)
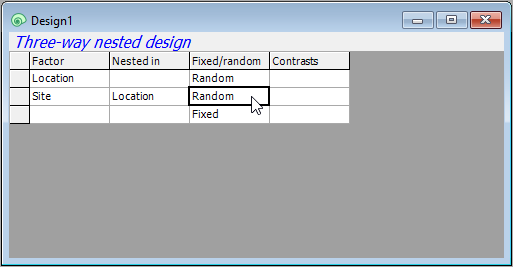
6. Make sure that the factor 'Site' is also specified in column 3 as 'Random'. (This happens automatically after specifying a nested term in column 2, because nested terms are, almost always, random factors.) Your design file should now look like this:
[](https://learninghub.primer-e.com/uploads/images/gallery/2024-04/12c-site-final.png)
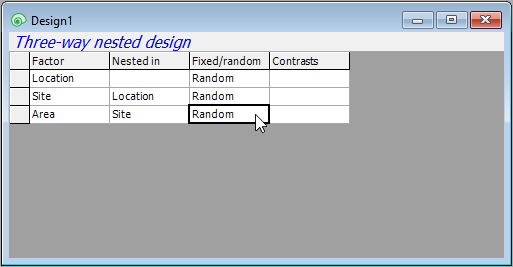
7. **Area:** Finally, we need to specify the third factor (Areas) correctly in row 3 of the design file. Under 'Factor' choose 'Area'. Under 'Nested in', specify 'Site', and make sure that column three has the word 'Random'. The final three-way nested design file should look like this:
[](https://learninghub.primer-e.com/uploads/images/gallery/2024-04/13-final-design.png)