# Dendrogram & 2-d MDS in a 3-d plot
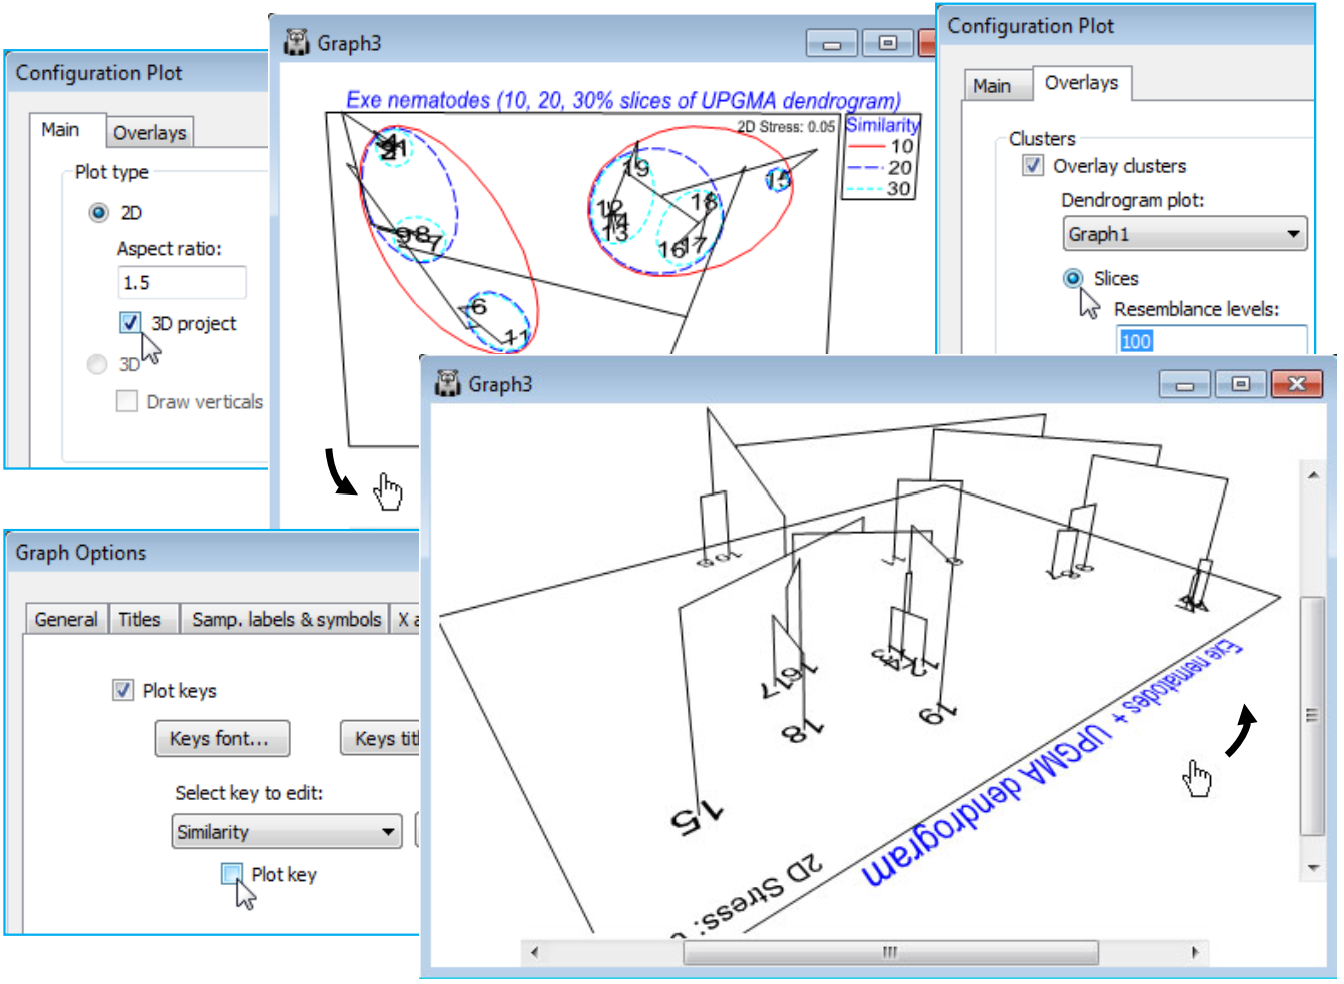
Rather than creating a small number of (arbitrary) slices through a dendrogram, superimposed on a 2-d MDS, a further new feature in PRIMER 7 is the ability to draw the dendrogram as the third dimension in a 3-d plot of the 2-d MDS (or any ordination). As with all 3-d plots (see shortly), the graph is then rotatable, to allow good visualisation of the 2-d MDS in juxtaposition with the full dendrogram. This is again accessed from the **Graph>Special** dialog. With the current 2-d MDS for the Exe nematode data (Graph3), under the **Main** tab take (Plot type•2D)>(✓3D project). Under the **Overlays** tab, it is also necessary that you select (Clusters>✓Overlay clusters) and take either (•Slices) or (•Simprof groups), with the correct plot dendrogram specified, e.g. (Dendrogram plot: Graph1) for the former. From the previous page, the option (Resemblance levels: 10, 20, 30) will already be implemented, giving the first plot below, but if it is considered unnecessary to duplicate the envelopes on the 2-d plot as well as adding the full dendrogram, the envelopes can be switched off, effectively, by taking (Resemblance levels: 100). To get precisely the second plot below, there are some further minor steps: the title has been changed from the **Titles** tab on the standard Graph Options dialog box; the unneeded Similarity key is removed by unchecking the (✓Plot key) box on the **Keys** tab of Graph Options; the plot has been zoomed with **Graph**> (or right-click) **Zoom In** or the [](https://learninghub.primer-e.com/uploads/images/gallery/2024-06/zoominicon.png) icon (this is often a useful step with a 3-d plot – note the scroll bars which allow the figure to be appropriately centred). Finally, the plot is rotated with **Graph>Rotate Axes** or the [](https://learninghub.primer-e.com/uploads/images/gallery/2024-06/rotateicon.png) icon, then clicking, holding and dragging with the cursor, which is now a hand.
[](https://learninghub.primer-e.com/uploads/images/gallery/2024-07/screenshotpage124a.png)