# Spinning a 3-d MDS & capture in a movie file
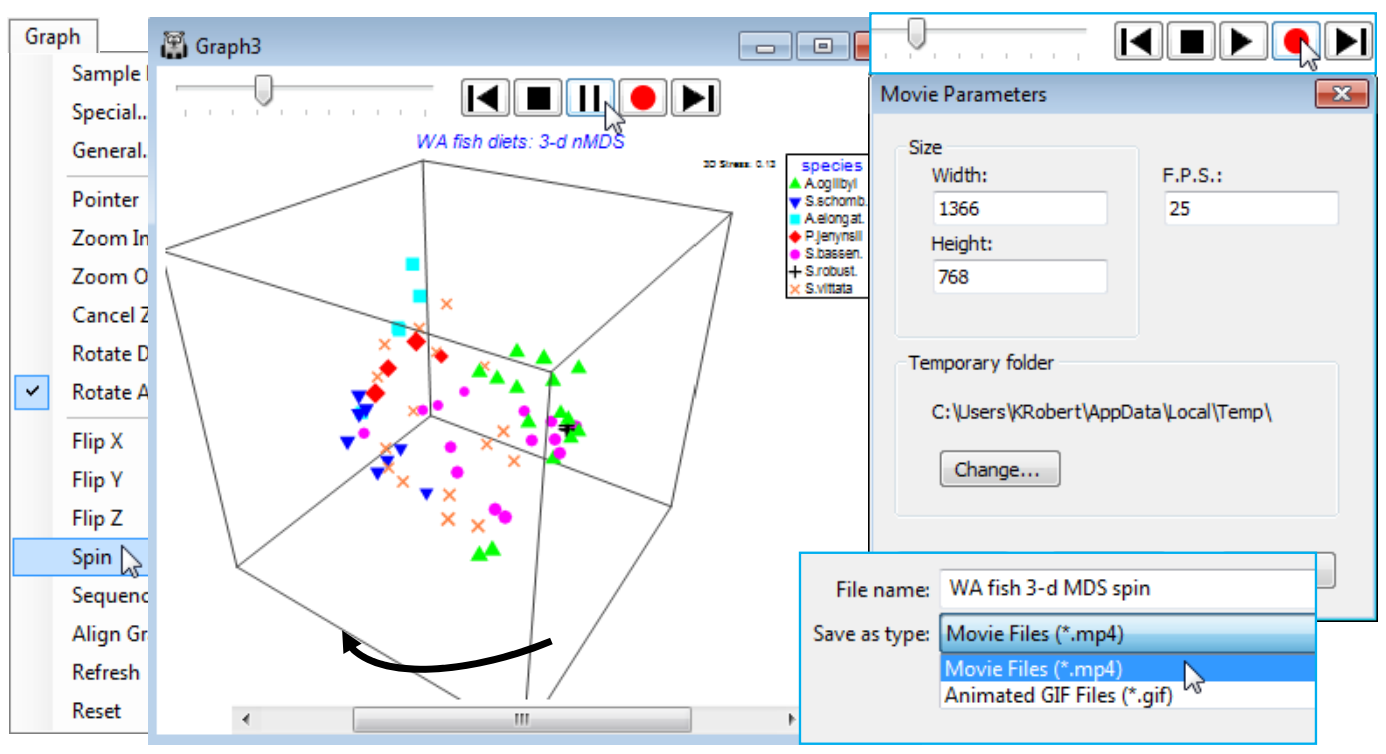
The 3-d MDS plot box can be made to rotate horizontally, automatically (from whatever vertical perspective view it is manually set to), by **Graph>Spin**. This adds a top line of controls for the animation: to the left is a slider control [](https://learninghub.primer-e.com/uploads/images/gallery/2024-07/slidericon.png) which sets the speed of rotation (click and drag to the right for higher speed), followed by a bank of standard video-type controls, the key ones of which are to start the automatic spin with [](https://learninghub.primer-e.com/uploads/images/gallery/2024-07/playicon.png) , which then changes to a pause button [](https://learninghub.primer-e.com/uploads/images/gallery/2024-07/pauseicon.png) and an end to the **Spin** routine (and removal of the controls) is achieved by the [](https://learninghub.primer-e.com/uploads/images/gallery/2024-07/stopicon.png) button. PRIMER 7 has also introduced the ability to capture three automatic animations of this type (the other two, seen later, are a sequence animation and evolution of an MDS construction) to a digital ‘movie’ file with an \*.mp4 or animated \*.gif format, so that 3-d plots and the other animations can be embedded in presentations (or perhaps supplementary material for publications) in the same way as static graphs. Recording is launched from the [](https://learninghub.primer-e.com/uploads/images/gallery/2024-07/recordicon.png) button, which gives a Movie Parameters dialog box specifying: pixel sizes for the images, the default being (Width: 1366)&(Height: 768); the number of frames per second, default (F.P.S.: 25); and an option to change the temporary folder used in the recording. The usual Save As dialog box then allows the directory and filename for the movie file, and the file type (\*.mp4, animated \*.gif) to be specified, and recording starts with [](https://learninghub.primer-e.com/uploads/images/gallery/2024-07/playicon.png) and finishes with [](https://learninghub.primer-e.com/uploads/images/gallery/2024-07/stopicon.png) . Long recordings should be avoided: the movie files will get very large, very quickly!
[](https://learninghub.primer-e.com/uploads/images/gallery/2024-07/screenshotpage128a.png)
(Re)save the workspace as WA fish ws for use in later in this section, and close it.