Step 3: Specify the design
PERMANOVA requires a design file to run.
You can see the Factors associated with the holdfast data matrix (or its resemblance matrix) by clicking on Edit > Factors.... These factors will be 'visible' to the PERMANOVA dialog that we will use to create our design file.
For this study, we want to create a design file that has all of the information that PERMANOVA will need to construct the correct partitioning, the correct pseudo-F ratios and the correct permutation algorithms to test every term in the model that is implied by the design. For this example, we have a fully hierarchical (nested) study design with three random factors: Locations, Sites (within Locations) and Areas (within Sites).
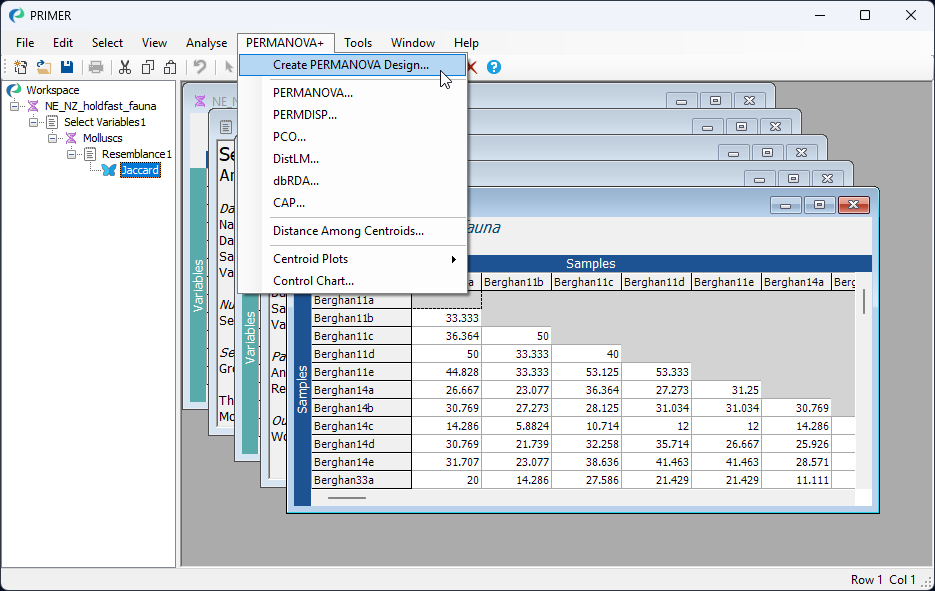
- From the resemblance matrix ('Jaccard'), click PERMANOVA+ > Create PERMANOVA Design....
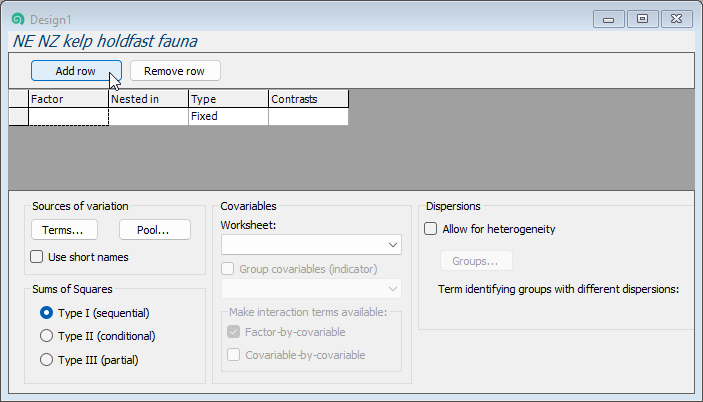
- You will see a design file, which always is indicated in the Explorer tree by the symbol
 , which you can use to specify all pertinent aspects of the sampling / experimental design‡. Initially, it will only be shown with a single row. There need to be as many rows as there are factors in your design. So, here, we will add two more rows by clicking on the 'Add row' button twice:

This yields:
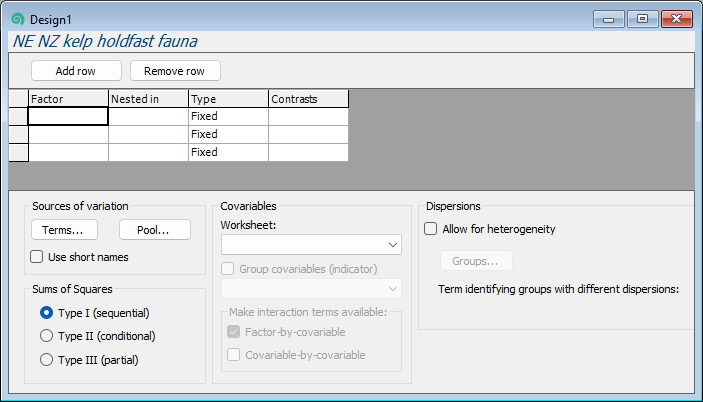
Next, you will need to specify, in turn, the name and properties of each factor for the analysis in its own row.
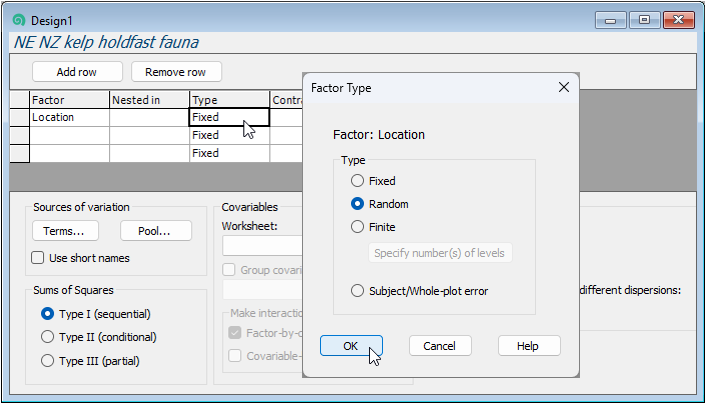
- Location: First, in row 1, double-click in the blank cell under the word 'Factor', and you will see a drop-down menu listing all of the factors associated with the resemblance matrix from which this design file was created. Choose 'Location' to fill this cell. Location is not nested in anything, so we leave the second cell in row 1 blank. In the third cell of row 1, we have to specify that Location is a random factor, so double-click on the word 'Fixed' and in the 'Factor Type' dialog window under 'Type', click on $\bullet$Random, then click OK.
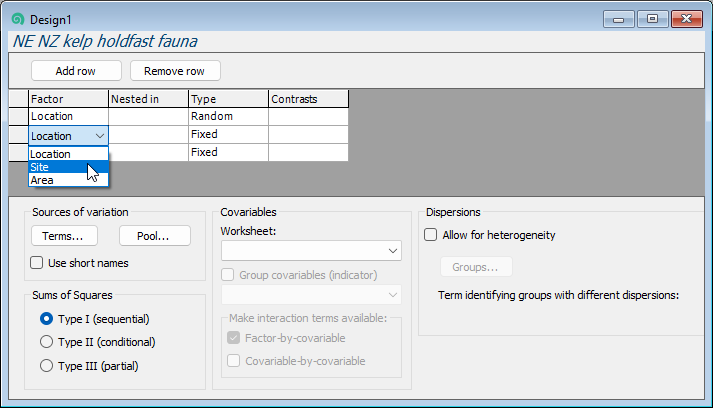
- Site: Next, we need to specify the second factor in the design in row 2 of the design file. Double-click on the cell in row 2 of the 'Factor' column (column 1) and choose 'Site'.
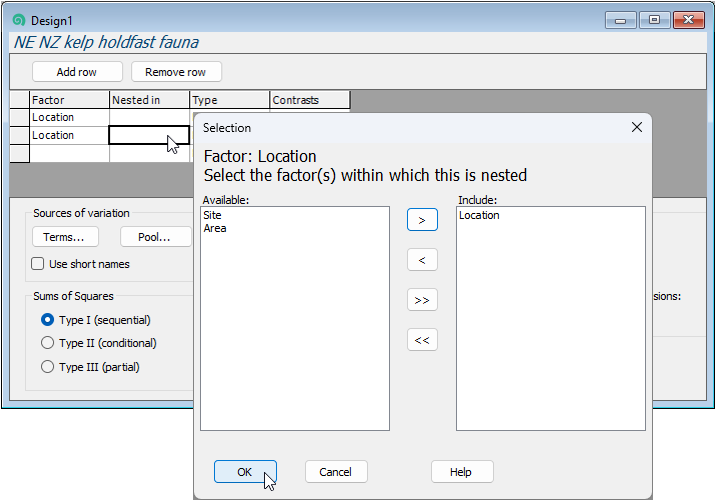
- Sites are nested in Locations, so we have to specify that in column two ('Nested in'), accordingly. Double-click on the cell in row 2 in column 2 and a 'Selection' dialog will pop up to allow you to choose the factors within which 'Site' is nested. You will need to click on the word 'Location' (in the 'Available:' box on the left), then on the single-right-arrow button (
 ) to move it over into the 'Include:' box (on the right), then click OK, like so:
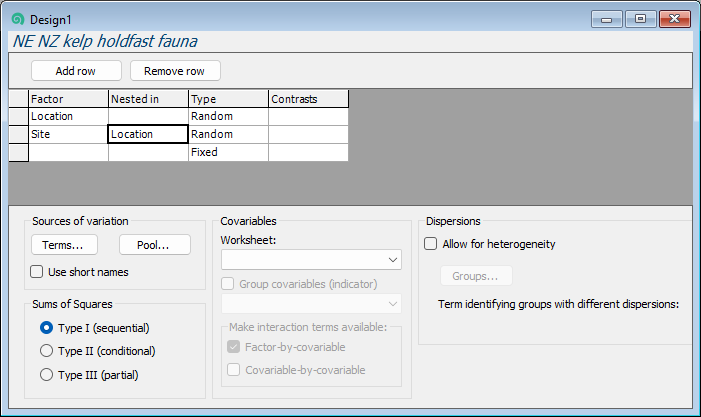
- Make sure that the factor 'Site' is also specified in column 3 as 'Random'. (This happens automatically after specifying a nested term in column 2, because nested terms are, almost always, random factors.) Your design file should now look like this:
- Area: Finally, we need to specify the third factor (Areas) correctly in row 3 of the design file. Under 'Factor' choose 'Area'. Under 'Nested in', specify 'Site', and make sure that column three has the word 'Random'. The final three-way nested design file should look like this:
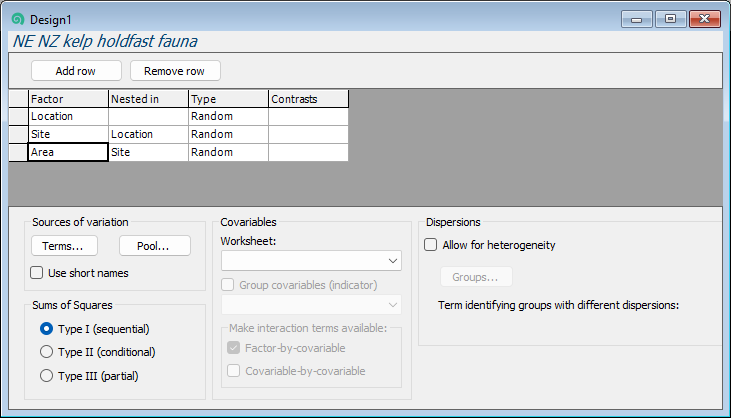
Now our design file has all of the relevant information to run the PERMANOVA analysis.
You can see all of the terms in your PERMANOVA model by clicking on the 'Terms' button, as shown below:
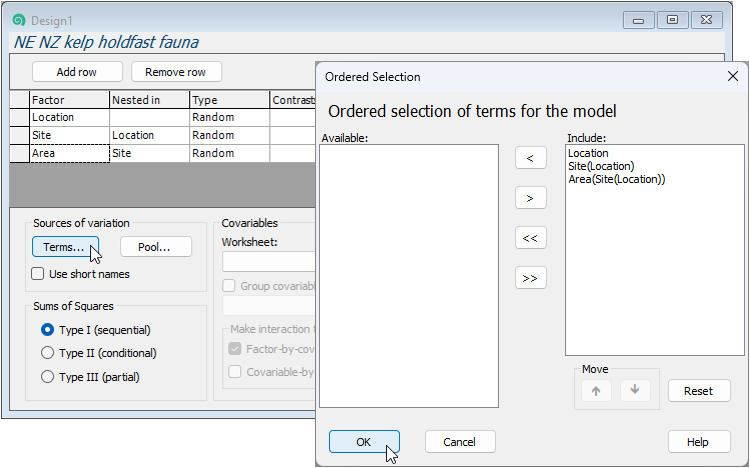
(Nb. There are no interaction terms in this particular fully nested hierarchical design, but if interactions are implied by your design e.g., in crossed designs, then all such interaction terms, by default, will be included in the model.)
You will note that there are other options here, including the ability to:
- change the model by removing or pooling terms, or change their order,
- include tests of specific contrasts,
- choose the 'Type' of sums of squares (e.g. for unbalanced cases),
- add quantitative covariates; and/or
- accommodate heterogeneity of dispersions, etc.
Here, we shall leave all of these as their defaults. We are now ready to run the PERMANOVA analysis itself according to these design specifications.
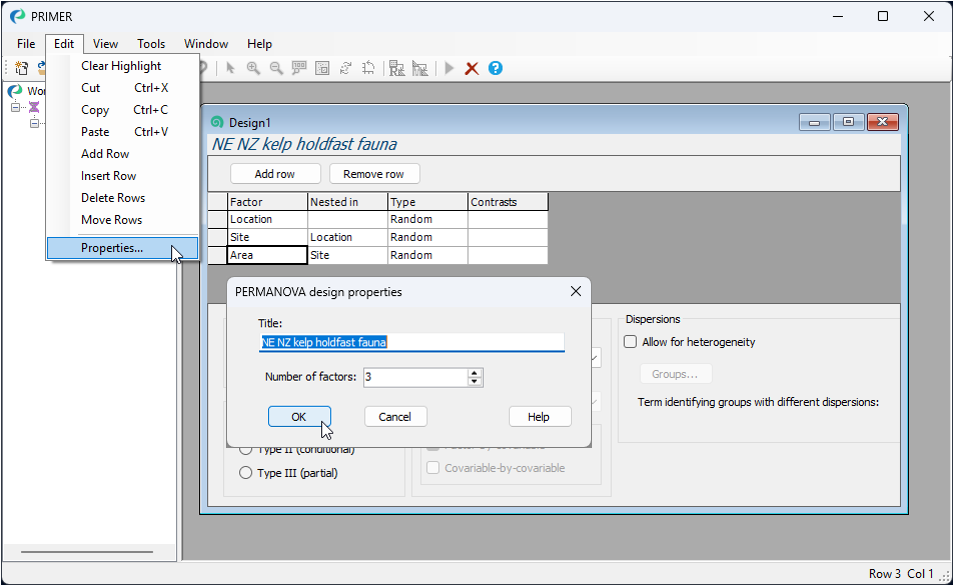
‡ Note that a Design-file item in PRIMER 8 has its own properties, which you can see by clicking on Edit > Properties. Doing this shows a title for the design (which can be modified if desired) and you can also specify the number of factors (rows) in this way (rather than using the 'Add row' and 'Remove row' buttons):