1.9 Creating a design file
We shall formally test the hypothesis of no differences in community structure among the four groups (where, in this case, “differences in community structure” is defined by the Bray-Curtis measure on fourth-root transformed data) using PERMANOVA. For any analysis using PERMANOVA, there are necessarily two steps involved. First, one must create a design file, which provides all of the necessary information for the partitioning to be done according to the correct factors and experimental design. The design file is unique to the PERMANOVA+ add-on package, with its own special icon:![]() . It has a direct link to the factor information associated with the samples in the resemblance matrix. (The factor information associated with the raw data matrix is inherited by any resemblance matrix produced from the data.) Once an appropriate design file has been created, the second step is to run the PERMANOVA analysis itself on the resemblance matrix, providing the name of the design file. Although the above general description of the method has used a distance or dissimilarity matrix at its base, PERMANOVA will also perform a correct analysis when given a resemblance matrix of similarities. For example, in the present case, the Bray-Curtis dissimilarity is defined simply as 100 minus the Bray-Curtis similarity. This is done automatically and the user need not perform any extra steps.
. It has a direct link to the factor information associated with the samples in the resemblance matrix. (The factor information associated with the raw data matrix is inherited by any resemblance matrix produced from the data.) Once an appropriate design file has been created, the second step is to run the PERMANOVA analysis itself on the resemblance matrix, providing the name of the design file. Although the above general description of the method has used a distance or dissimilarity matrix at its base, PERMANOVA will also perform a correct analysis when given a resemblance matrix of similarities. For example, in the present case, the Bray-Curtis dissimilarity is defined simply as 100 minus the Bray-Curtis similarity. This is done automatically and the user need not perform any extra steps.
To create a design file for the Ekofisk macrofauna example (Fig. 1.8), use the explorer tree in the left-hand panel and click on the resemblance matrix, then select PERMANOVA+ > Create PERMANOVA design. In the initial dialog box, entitled ‘PERMANOVA design properties’, specify (Title: Ekofisk oilfield macrofauna) & (Number of factors: 1). This will bring up a new design worksheet file with one row for each factor (so only one row in the present example) and four columns. The first column is used to indicate the name of each factor, the second column is for specifying any factors within which it may be nested, the third column is for specifying whether the factor is fixed or random and the fourth column is for specifying specific contrasts among levels of the factor. You can either begin by typing the name of the factor inside the cell of the first column, or by double clicking inside this cell and a list of all the factors associated with the resemblance matrix will be brought up automatically for you to choose from. For this data set, select the factor Dist, as shown (Fig. 1.8). This factor is not nested within any other factor (leave the cell in the second column blank), it is fixed (select ‘Fixed’ in the third cell, which is the default), and we do not wish at present to specify any specific contrasts (leave the cell in the fourth column blank).
Once the design file is created, you may change its name, edit its properties and so on, as for any other PRIMER file within the workspace. For example, select Edit from the main menu to see how rows (i.e., factors) may be inserted, moved or deleted. Rows of the design file can also be edited by selecting them directly, or by right-clicking on the design file itself, as you would for editing a worksheet (e.g., see chapter 1 of Clarke & Gorley (2006) ). Like other PRIMER files, the design file can also be saved separately in its own format (*.ppd). For the present example, change the name of the design file for the Ekofisk data from the default (Design1) to One-way by right-clicking on its name in the explorer tree and selecting Rename item. Save the entire workspace with the name ekofisk.pwk for continued analysis.
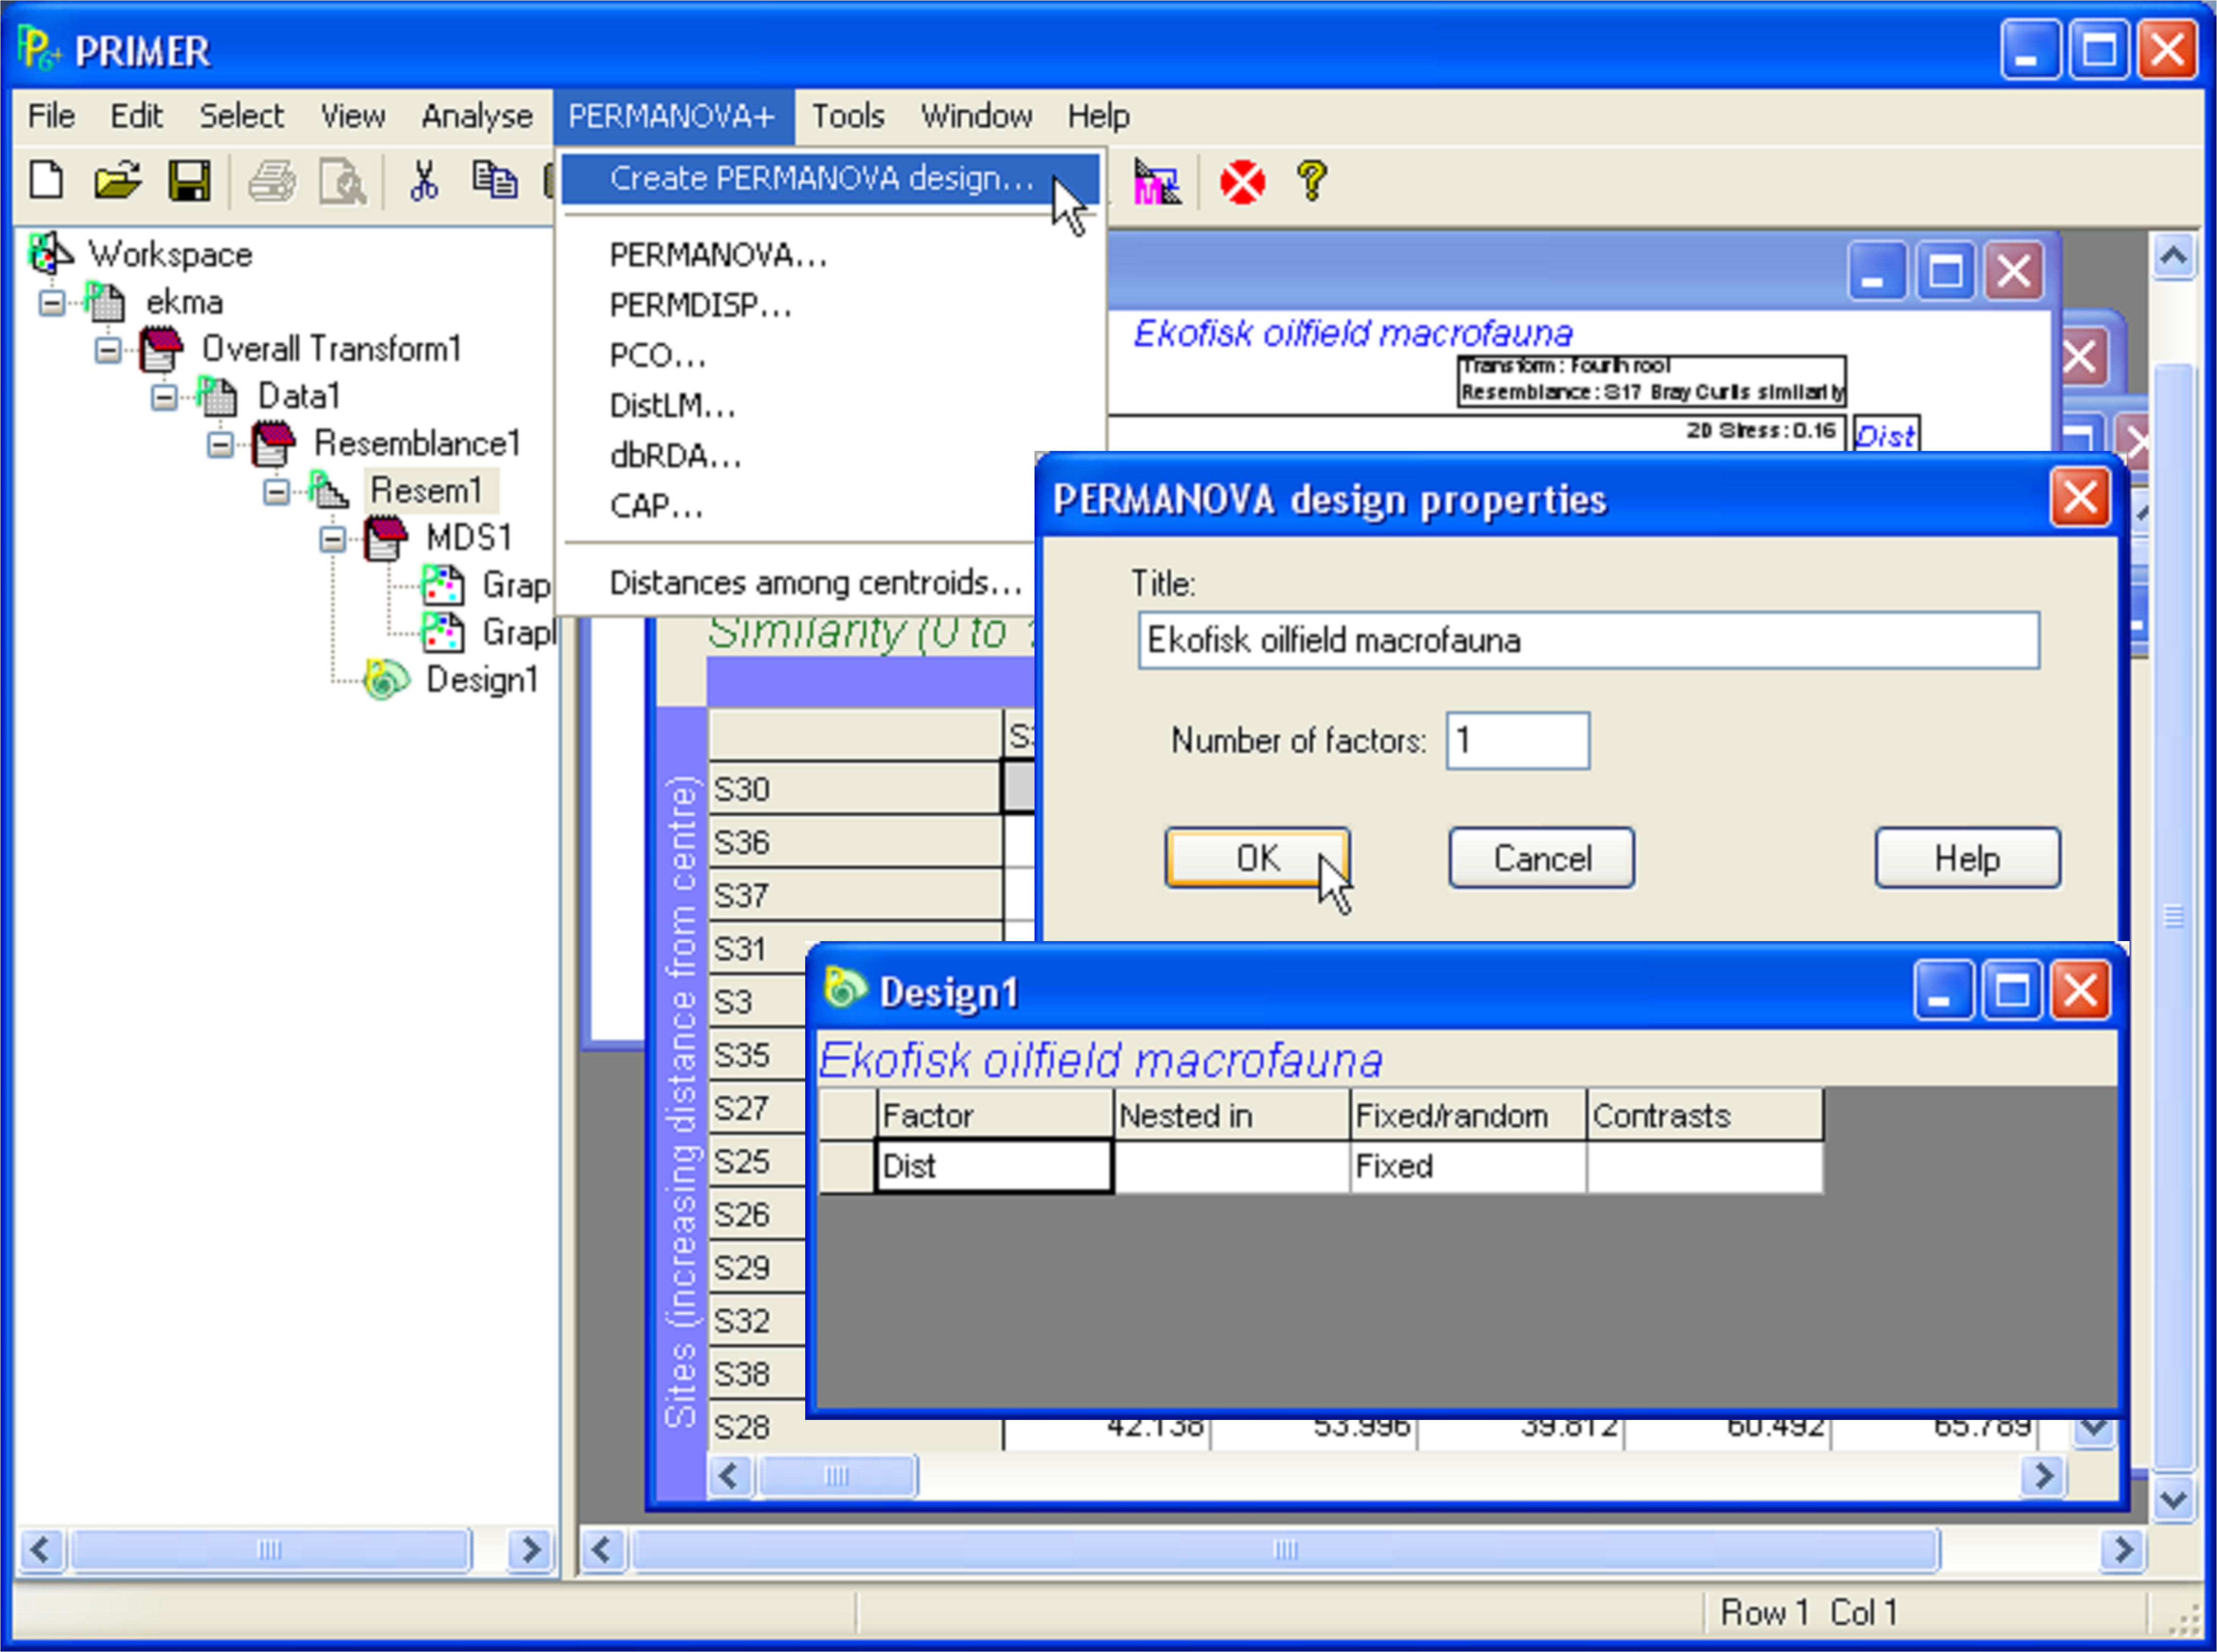 Fig. 1.8. Creating a design file for the Ekofisk one-way design.